A while back, I wrote about putting a regulation sidewalk in front of my house via my own funding. (http://shadeparadenashville.blogspot.com/2014/01/sidewalk-project-4-my-house.html)
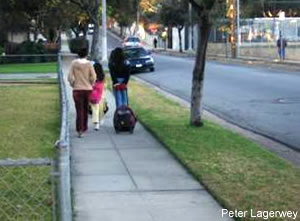
If the funding for sidewalks here in Nashville is chronically underfunded…how can we move forward and get some sidewalk panels in place?
DIY?
Step 1: Determine Path Placement and Begin Excavation
Plot out the course of the path using stakes and strings. Mark with paint. Excavate the path to a depth of 8”, removing all grass, roots and debris. Tamp down the soil to form a flat base. Pour gravel to a depth of 4” and tamp it down to a level surface.

Step 2: Build the Formwork
Use 1" x 4" x 4’ boards to create forms for the sides of the walkway. Drive wooden stakes along path at 4' intervals, placing them just outside the planned pathway. Attach 1" x 4" x 4’ boards to the inside of the stakes with screws to create the form for the concrete. Make sure all form boards are plumb and level.
It is imperative that the tops of the stakes are lower than the form sides so they don't interfere in the smoothing process later. After the forms are built, spray them lightly with water before filling with concrete.

Step 3: Pour, Level and Smooth
Prepare pre-mixed concrete according to manufacturer’s instructions. Working from the walkway’s lowest point to its highest, begin pouring concrete into the form. Roughly level the concrete with the back of a garden rake as soon as you finish pouring.
Before the concrete gets too hard, smooth and level the concrete by sliding a 2” x 4” board back and forth across the tops of the forms (Image 1). This process is known as screeding. Use a concrete float to further smooth out the surface of the concrete (Image 2). For best results, hold the float at a slight angle.


Step 4: Finish the Concrete
After the concrete has set for an hour or so, run an edging trowel along the inside of the forms to separate the concrete and create a finished edge (Image 1). At 4' intervals, lay a straight board across the forms and use a groove trowel to create expansion joints across the concrete walkway (Image 2). These joints allow the concrete to expand and contract and thus help eliminate cracking.
Before the concrete fully sets, lightly drag a broom across the surface to add a non-slip texture. Covering the concrete with plastic as it cures will help prevent cracking. After 48 hours, remove the plastic and the wooden forms.


Ideally, the proportions of your new sidewalk would be a 5' sidewalk with a 4' green buffer zone. Make sure you look above your proposed sidewalk placement for power & telephone lines which could limit the height of your trees. Consider planting smaller trees in the green buffer zone to provide shade (for a list of trees see:http://shadeparadenashville.blogspot.com/2014/04/shade-parade-nashville-asks-that-you.html.
There are also many great examples of storm water capture that can carry run off and funnel it away from city storm water sewers.

***
Shade Parade Nashville & The Sidewalk Foundation are dedicated to increasing walkability in Nashville via high quality and well designed sidewalks.
Do you want to buy a panel?
Do you want to buy a panel?
***
http://www.diynetwork.com/how-to/how-to-pour-a-concrete-walkway/index.html
Nice Blog, Really Good Content, Really Helpfull for us, I have also a Some Great Content For you Guys, so just go through and take benefit of asphalt services broward county
ReplyDeleteasphalt sealcoating broward county
asphalt repair & patching broward county
asphalt overlay broward county
brick paver driveways broward county
cement curbing broward county
line striping broward county
thermoplastic markings broward county
concrete sidewalks broward county
I read your whole content it’s really interesting and attracting for new user. Really appreciable I will definitely inform other reader to read your content compulsorysidewalk repair queensOur team of experts can handle a number general construction and building violation repair tasks for you, including sidewalk violation repair, sidewalk bridge construction, facade repairs, and even special rigger licensed suspended scaffolding services.
ReplyDelete